*klik pada gambar untuk pembesaran.
Fixing Plymouth's resolution
First of all, the logo looks fine when you install Ubuntu, but, after you install the proprietary Nvidia and ATI video drivers, the logo gets bigger and ugly! Below, we provide two fixes for this issue: the first one will fix the resolution of the Ubuntu logo, pretty much like it was when you installed Ubuntu; and the second one will remove the logo, showing only a dark screen until the login manager appears.Without any further ado, follow the instructions below to fix your boot splash in Ubuntu 10.04 LTS (Lucid Lynx).
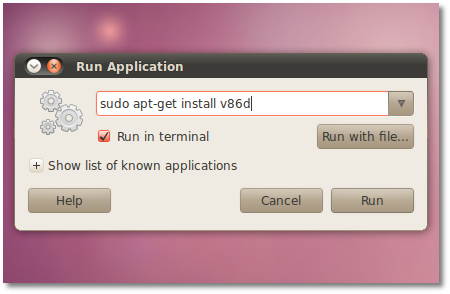
Step 1: Hit the ALT+F2 key combination, paste the following command and check the "Run in terminal" option:
sudo apt-get install v86d
...a terminal window will appear. Enter your password when asked, hit the Enter key and wait for the package to be installed. The terminal window will automatically close!
 |
Step 2: Hit the ALT+F2 key combination, paste the following command and check the "Run in terminal" option:
gksu gedit /etc/default/grub
...enter your password when asked and hit the Enter key.
- Replace the following line (line number 9):
GRUB_CMDLINE_LINUX_DEFAULT="quiet splash"
with this one:
GRUB_CMDLINE_LINUX_DEFAULT="quiet splash nomodeset video=uvesafb:mode_option=1280x1024-24,mtrr=3,scroll=ywrap"
- Replace the following line (line number 18):
#GRUB_GFXMODE=640x480
with this one:
GRUB_GFXMODE=1280x1024
The file should look like this:
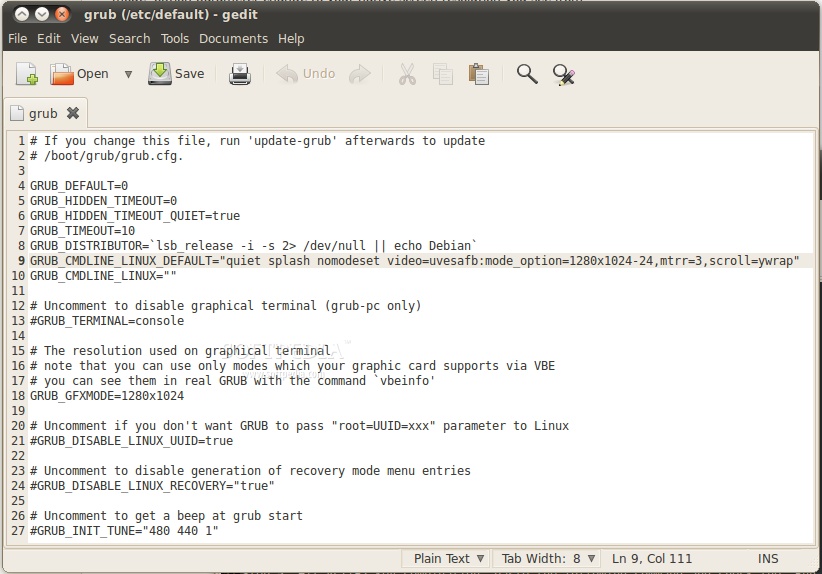 |
Save the file and close it!
Step 3: Hit the ALT+F2 key combination, paste the following command and check the "Run in terminal" option:
gksu gedit /etc/initramfs-tools/modules
When the text window appears, add the following line at the end of the file:
uvesafb mode_option=1280x1024-24 mtrr=3 scroll=ywrap
It should look like this:
 |
Save the file and close it!
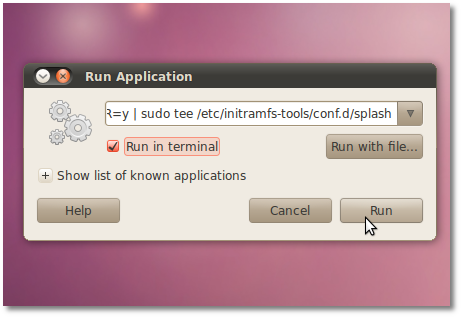
Step 4: Hit the ALT+F2 key combination, paste the following command and check the "Run in terminal" option:
echo FRAMEBUFFER=y | sudo tee /etc/initramfs-tools/conf.d/splash
...a terminal window will appear for a second or two. The terminal window will automatically close!
 |
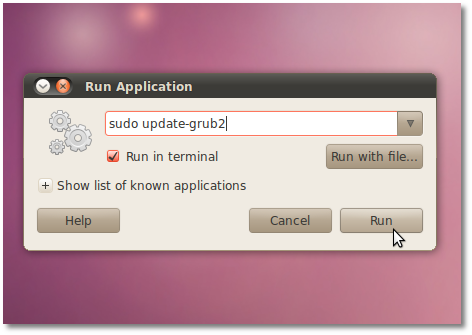
Step 5: Hit the ALT+F2 key combination, paste the following command and check the "Run in terminal" option:
sudo update-grub2
...a terminal window will appear. Enter your password when asked, hit the Enter key and wait for the command to finish. The terminal window will automatically close!
 |
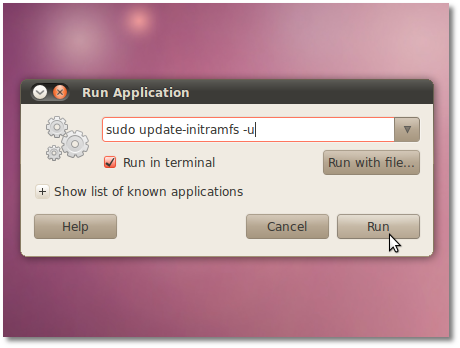
Step 6: Hit the ALT+F2 key combination, paste the following command and check the "Run in terminal" option:
sudo update-initramfs -u
...a terminal window will appear. Enter your password when asked, hit the Enter key and wait for the command to finish. The terminal window will automatically close!
 |
Step 7: Reboot your computer. When the system starts, you should see a better looking Ubuntu logo!

thanks to Marius Nestor from softpedia
No comments:
Post a Comment